Mastering the Art of Drawing:7BARSUG8U0W= Spiderman: A Comprehensive Guide
Drawing:7BARSUG8U0W= Spiderman; It’s an exciting task to bring Spider-Man to life through your artwork! This tutorial will walk you through the steps of making your very own Spider-Man illustration, regardless of your level of drawing experience. We’ll go over everything, from the first sketches to the finishing touches, so it’s going to be fun and instructive.
In this guide, you’ll find straightforward instructions that simplify the process of Drawing:7BARSUG8U0W= Spiderman. We’ll start with basic shapes and gradually move on to adding intricate details and coloring. Each step is designed to enhance your artistic skills, so don’t stress if your first attempt isn’t perfect—practice is key to improvement!
As you follow along, you’ll learn how to capture the dynamic energy and iconic features of Spider-Man in your drawing. With just a pencil and paper, you’ll be well on your way to creating a superhero masterpiece. So grab your art supplies and let’s embark on this creative journey together!
Essential Tools for Drawing:7BARSUG8U0W= Spiderman: What You’ll Need to Get Started
To begin your journey in Drawing:7BARSUG8U0W= Spiderman, you don’t need an extensive array of tools, but having the right ones can significantly enhance your artistic experience. At the core of your toolkit should be a reliable pencil. Pencils are indispensable for sketching, allowing you to make light, adjustable lines that are perfect for refining and correcting your work. Opt for a pencil with a fine tip for intricate details and a softer lead for shading to add depth to your drawing.
Equally important is a good eraser. A high-quality eraser will enable you to correct mistakes and make adjustments without smudging your paper. Consider using a soft, non-smudging eraser, and a kneaded eraser can be particularly useful for delicate corrections and precision.
Choosing the right paper is also crucial. While standard drawing paper is adequate, sketching paper offers a smoother surface that can enhance the quality of your drawing. Ensure that the paper is durable enough to withstand pencil pressure and any subsequent coloring. A sketchbook can be an excellent choice for keeping all your drawings organized in one place.
When it comes to adding color to your Spider-Man drawing, you have several options. Crayons, colored pencils, and markers each offer unique effects. Colored pencils are ideal for blending and creating subtle shades, while markers provide vibrant, bold colors. Choose the medium that best suits your artistic vision.
For those who want to achieve precision in their artwork, a ruler and compass can be valuable tools. These instruments help create accurate lines and circles, which can be especially useful for Drawing:7BARSUG8U0W= Spiderman web patterns. With these essential tools, you’ll be well-equipped to produce a stunning rendition of your favorite superhero.
Correcting Mistakes in Your Spider-Man Drawing
Mistakes are a natural part of the drawing process, and they offer valuable learning opportunities. If you notice any errors while Drawing:7BARSUG8U0W= Spiderman, don’t be discouraged. Simply use your eraser to correct any lines or shapes that don’t look right.
Fixing mistakes not only improves your drawing skills but can also lead to new techniques and styles. Embrace the process of adjustment as part of your artistic journey. Remember, drawing is meant to be enjoyable, so each correction brings you closer to creating a fantastic Spider-Man illustration.
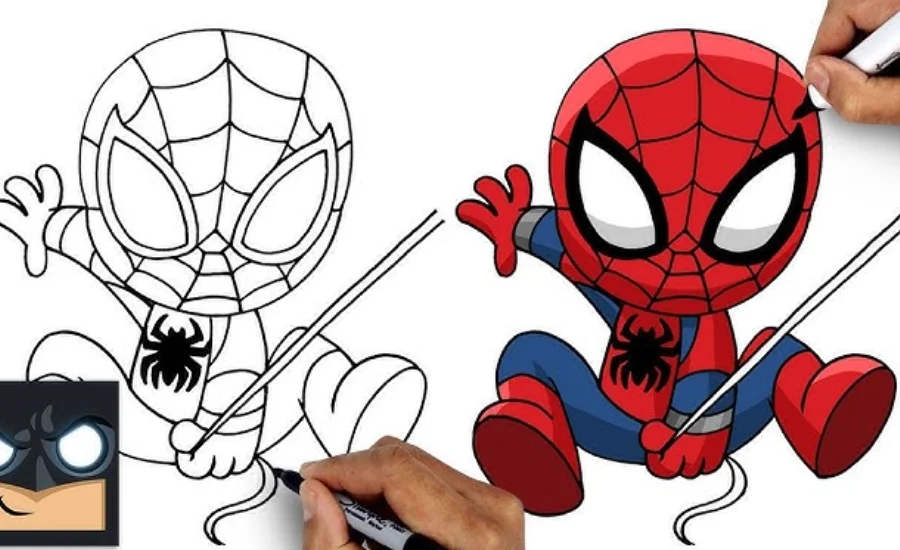
How to Start Drawing:7BARSUG8U0W= Spiderman: A Step-by-Step Guide Using Basic Shapes
When embarking on your Spider-Man drawing, beginning with fundamental shapes can streamline the process and enhance your results. Start by sketching a circle to represent Spider-Man’s head. This simple shape will act as a guide for positioning his facial features, such as his eyes and mouth. Using a circle ensures that the head is proportionate and appropriately sized relative to the rest of the body.
Following this, draw an oval to outline Spider-Man’s torso. This oval will define the main section of his body and provide a framework for placing his arms and legs. By starting with an oval, you can easily adjust the body’s size and shape as you refine your drawing.
For Spider-Man’s limbs, use rectangles or elongated ovals. These shapes will represent his arms and legs. Position them thoughtfully to capture his dynamic pose, whether he’s leaping through the city or standing in a heroic stance. Keeping these shapes simple at the outset helps you focus on achieving accurate proportions before adding more intricate details.
Once the basic shapes are established, connect them with smooth lines to form Spider-Man’s body. Refine the shapes by adding curves and adjusting the lines to create a more natural appearance. This step transitions your drawing from basic shapes to a more detailed representation of Spider-Man’s figure.
Starting with these foundational shapes makes it easier to build up the details of your Spider-Man drawing. This approach allows you to make adjustments and ensure accurate proportions and poses before adding finer details, resulting in a more polished and dynamic artwork.
Why Drawing:7BARSUG8U0W= Spiderman is a Fun and Rewarding Activity for Kids
For kids who are big fans of superheroes, Drawing:7BARSUG8U0W= Spiderman is a great opportunity. Young artists will find this beloved character, renowned for his daring adventures and web-slinging feats, to be an ideal subject. Children become engrossed in Spider-Man’s exciting world when they sketch him, making their creative endeavors interesting and fun.
Children can express their creativity freely when they sketch Spider-Man, which is one of the most exciting aspects of the hobby. They can incorporate their own styles into their artwork by experimenting with different colors, poses, and facial expressions. Their imagination is sparked by this creative freedom, which also helps them produce one-of-a-kind, personalized works of art.
Beyond the creative benefits, Drawing:7BARSUG8U0W= Spiderman helps kids develop important skills. The process of creating their artwork fosters focus, patience, and problem-solving abilities—skills that extend well beyond the realm of art. Completing a drawing also gives children a sense of achievement, boosting their confidence and reinforcing their ability to tackle challenges.
Additionally, creating Spider-Man art can be a social activity that enhances connections with friends and family. Children can share their drawings, collaborate on projects, and even engage in friendly competitions. This interactive aspect makes the activity more enjoyable and provides a platform for exchanging ideas and tips.
Finally, Drawing:7BARSUG8U0W= Spiderman serves as a wonderful way for kids to unwind and take a break from their daily routines. It offers a creative diversion from screen time and other activities, making it a relaxing and fulfilling hobby. Whether as a solitary pursuit or a group activity, sketching Spider-Man can be a delightful way for children to express themselves and enjoy their time.
Making Your Spider-Man Drawing Look Realistic
To achieve a realistic look in your Spider-Man drawing, focus on adding shading and highlights. Consider where the light would naturally hit Spider-Man’s body and costume. Use lighter colors in these areas to represent light, and darker colors for shadows.
Shading adds a three-dimensional quality to your drawing. Concentrate on areas like muscles and folds in the costume. By blending colors and applying shading with care, you’ll enhance the realism and detail of your artwork. Practice regularly to refine your shading skills and achieve more lifelike results.
Practicing Spider-Man Drawing Daily
Daily practice is key to improving your Spider-Man drawing skills. You don’t need to spend hours each day; even a few minutes of practice can lead to significant progress.
Experiment with different poses and use reference images from comics or online sources to guide your practice. The more you draw, the more confident you’ll become. Consider setting challenges, like Drawing:7BARSUG8U0W= Spiderman faster or using new tools like markers or pens.
Sharing Your Spider-Man Drawing with Others
Once you’ve completed your Spider-Man drawing, share it with friends and family. They’ll likely be impressed with your work and may even want to try Drawing:7BARSUG8U0W= Spiderman themselves.
Posting your artwork online or in art communities is another great way to showcase your talent. Engaging with other artists and receiving feedback can provide valuable insights and inspiration for your future drawings. Sharing your art can boost your confidence and motivate you to continue creating superhero masterpieces.
Enhancing Your Artistic Skills Through Spider-Man Drawings
Drawing:7BARSUG8U0W= Spiderman offers more than just enjoyment; it’s an excellent way to develop your artistic abilities. Each drawing session helps you practice crucial skills such as observation, hand-eye coordination, and patience.
Creating a detailed character like Spider-Man requires a keen eye for detail, which in turn enhances your ability to replicate real-life subjects. As you refine your technique with Spider-Man, you’ll find that these skills translate to improved accuracy in drawing other subjects.
By concentrating on the various elements of Spider-Man’s design—from his iconic suit to his expressive features—you can refine your artistic style and technique. Regular practice not only boosts your proficiency but also helps you evolve as an artist. Keep drawing, and you’ll see significant progress in your art over time.
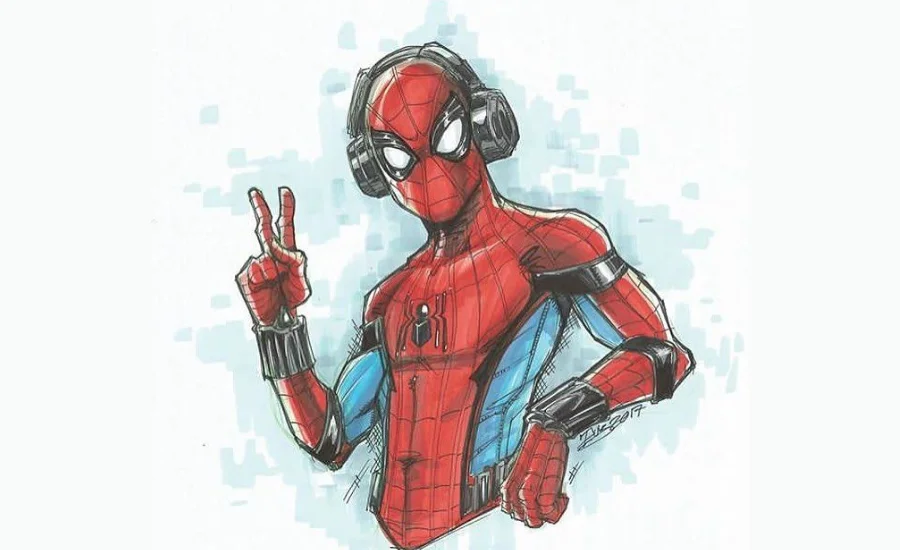
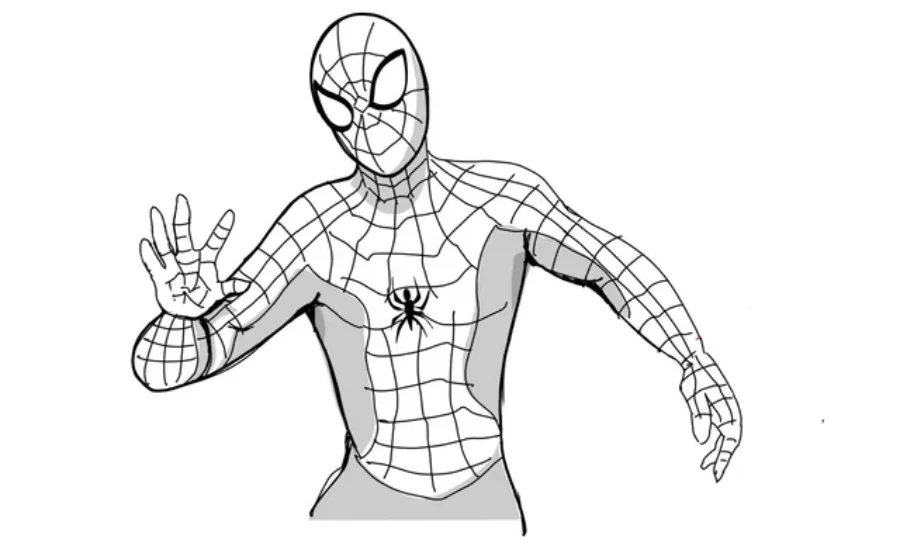
Drawing:7BARSUG8U0W= Spiderman Iconic Costume: A Step-by-Step Guide
To create an accurate depiction of Spider-Man’s iconic costume, start by outlining the basic shape of his body using the previously drawn oval and rectangle shapes. Sketch the overall form of the suit, ensuring it fits closely to his body. The lines should follow the contours of his muscles and limbs, giving the suit a realistic appearance.
Next, incorporate the classic web patterns on Spider-Man’s suit. Begin by drawing the web lines that radiate outward from the central torso. These lines should curve and intersect to create the distinctive web effect. Start from the center of his chest and work your way outwards, maintaining even spacing and ensuring the lines connect to form a cohesive web design.
Focus on the prominent spider symbol located on Spider-Man’s chest. Draw a large spider shape in the center of the torso, with its legs extending outward and curving slightly. This symbol is a key feature of Spider-Man’s costume, so take care to make it bold and distinct.
Once the web and spider symbol are in place, turn your attention to the details of Spider-Man’s mask. This includes outlining the shapes of his eyes and the web pattern that continues from his face onto the suit. Ensure that the web pattern transitions smoothly from the mask to the rest of the costume.
Finally, review your drawing and make any necessary adjustments. Clean up any extraneous lines and refine the details to give Spider-Man’s costume a sharp and polished look. By following these steps, you’ll create a detailed and accurate representation of Spider-Man’s iconic suit that will captivate any superhero enthusiast.
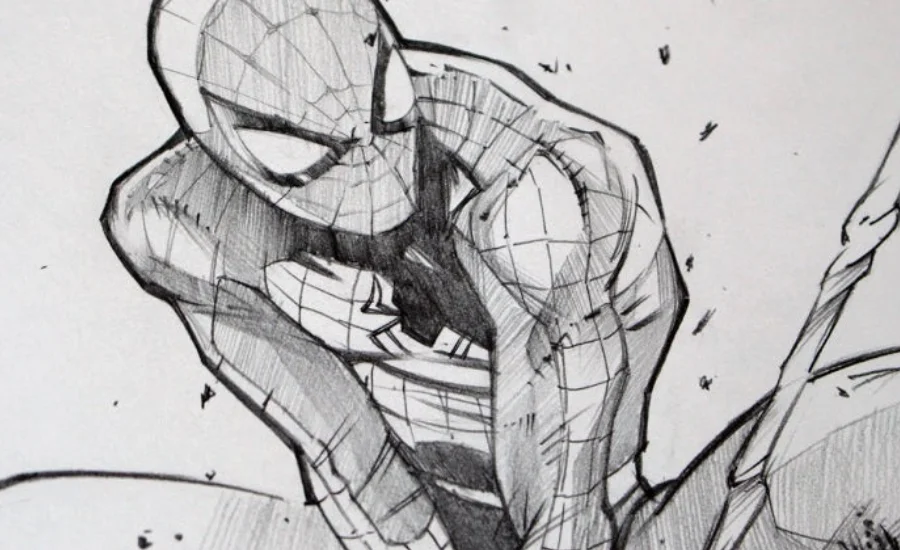
Adding Finishing Touches to Your Spider-Man Drawing
To bring your Spider-Man drawing to life, it’s essential to add detailed touches that enhance the superhero’s presence and make your artwork truly stand out. Start by refining the web pattern on Spider-Man’s suit. Carefully go over the initial lines and add more detail to make the web design appear dynamic and crisp. Ensure that the lines connect smoothly to create a realistic and striking web effect.
Next, focus on enhancing Spider-Man’s facial features. To give his eyes more depth and expression, darken the lines around them and add highlights to create a three-dimensional effect. Incorporate subtle lines around the eyes to suggest the texture of his mask, adding realism. Pay close attention to details such as the curves of his eyebrows and the shape of his mouth to capture his distinctive expression.
Improve the costume by adding shadows and highlights to give it a more lifelike appearance. Use a softer pencil to create shadows on areas like under his arms, around his waist, and along the sides of his legs. This shading will give the suit a three-dimensional quality. Highlight the raised areas of the costume to indicate where light naturally falls.
Complete your drawing with final touches to bring everything together. Review the overall composition and ensure that all parts of Spider-Man’s costume and face are well-defined. Erase any extraneous lines from the initial sketching phase to clean up your drawing. Consider adding small details such as stitching on the suit or subtle wrinkles to enhance texture and depth.
By focusing on these finishing touches, you will transform your Spider-Man drawing into a vibrant and detailed piece of art. These final enhancements will capture the essence of Spider-Man and elevate your drawing to the level of a true superhero masterpiece.
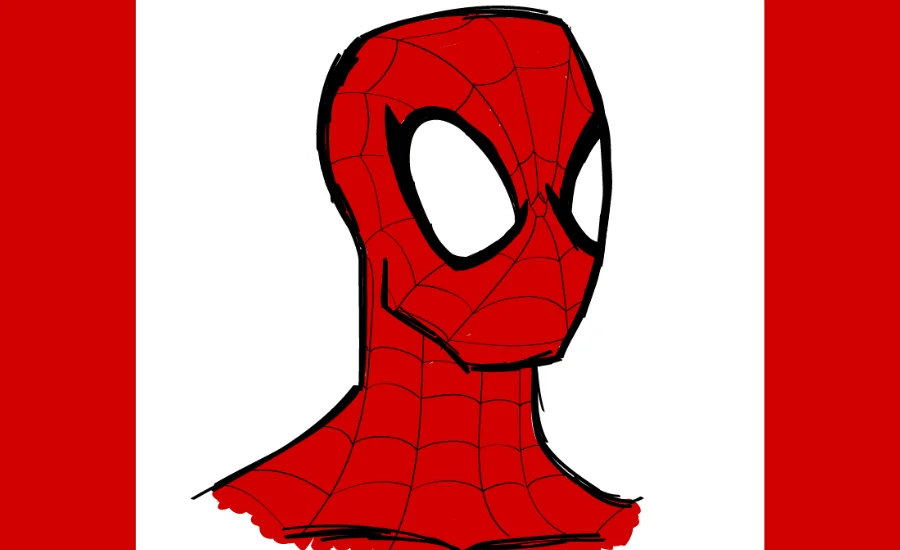
Crafting Spider-Man’s Face: A Detailed Approach
To begin Drawing:7BARSUG8U0W= Spiderman face, start with the circle you’ve already sketched. Begin by dividing this circle with both a vertical and horizontal line. This grid will serve as a guide for accurately positioning Spider-Man’s eyes and other facial features. Place the horizontal line slightly above the center of the circle, which is where Spider-Man’s eyes will be located.
Next, draw two almond-shaped eyes along the horizontal line. Spider-Man’s eyes are notably large and slightly angled, contributing to his distinctive and dynamic appearance. Ensure that the eyes are spaced evenly and centered within the face. You can also add a subtle curve above each eye to indicate his eyebrows, enhancing the expressiveness of his face.
Once the eyes are in place, sketch Spider-Man’s iconic web pattern. Start by drawing a series of curved lines emanating from the center of the face. These lines should create a web-like structure that extends towards the edges of the circle. This pattern is essential for capturing the character’s recognizable look.
For the mouth, draw a small, curved line situated below the eyes. Spider-Man’s mouth is generally depicted as a simple line, with a slight curve that can vary depending on his expression. Adding a gentle curve at the corners of the mouth can give him a more lively and animated expression.
Finally, refine the details of Spider-Man’s face by erasing any extraneous lines from your initial sketch. Clean up the web pattern and ensure that the eyes and mouth are clearly defined. These finishing touches will bring your drawing of Spider-Man’s face to life, capturing the essence of the beloved superhero.
Bringing Your Spider-Man Drawing to Life with Color
Coloring your Spider-Man drawing adds vibrancy and depth, transforming it into a striking piece of art. Begin by selecting the appropriate colors for Spider-Man’s iconic suit. Traditionally, Spider-Man’s costume features bright red and bold blue. Apply a vivid red to the primary areas of his suit, such as the chest and arms, while using a strong blue for his legs and sides. These colors should be bold and eye-catching, reflecting Spider-Man’s classic look.
When applying color, start with light layers. Use colored pencils or markers to build up color gradually, starting with lighter shades and adding darker tones as needed. This method allows for more control over the final appearance, avoiding harsh lines and ensuring a smooth, even finish.
For the web pattern on Spider-Man’s suit, choose a lighter gray or white. Carefully color in the web lines, making sure to stay within the lines and avoid smudging. The contrast between the web pattern and the suit’s colors will make the design stand out and enhance its visual impact.
To give your drawing depth and realism, incorporate shadows and highlights. Use a slightly darker shade of the base color to add shadows to areas where light naturally wouldn’t reach, such as under the arms and along the sides of the legs. For highlights, apply a white or very light color to areas where light hits directly, giving your drawing a more three-dimensional appearance.
Finally, review your coloring and make any necessary touch-ups. Ensure that the colors are evenly applied and that shadows and highlights blend seamlessly. Adding these finishing touches will elevate your Spider-Man drawing, making it look polished and vibrant.
Final Words
Drawing:7BARSUG8U0W= Spiderman is a rewarding and enriching experience for artists of all levels. As you delve into the process, you’ll discover not just the joy of creating a beloved superhero but also the growth of your artistic skills. Each sketch helps you refine your technique, enhancing your ability to observe details, coordinate your hand and eye, and express creativity.
With every line and color you add, you’re building more than just a picture; you’re developing a deeper understanding of art. The skills you gain from Drawing:7BARSUG8U0W= Spiderman will extend beyond this character, improving your overall artistic ability and confidence.
So, embrace the creative journey, enjoy the process, and continue to practice. With time and dedication, you’ll not only capture the essence of Spider-Man but also elevate your craft, turning every drawing session into an opportunity for artistic growth.
For more information join us on blog blower